[Image Processing] Naive image rotation without using library functions in Python
In this blogpost, we will try to implement the naive image rotation function from scratch to understand the concept of affine transformations in image processing. This is mainly for the understanding purpose, in case of practical applications, use of library functions is recommended which are fully optimized functions. In the context of python-based library implementations for affine transforms, one can use
-
warpAffine function from OpenCV library
-
AffineTransform class from scikit-image library
-
AffineTransform class from PIL library
For our task, we will write a function which takes two arguments, first argument is image which is to be rotated by amount of degrees provided as second argument.
Note: The function will rotate the image around its center by the specified degrees and we assume the size of the original and rotated image to be same. Although, we will also see, how we can modify the same function to get a rotated image showing the full image.
The code for the image rotation function and testing is as shown below:
# Written by Dr. S. S. Gajbhar
# Filename: transform1.py

import numpy as np
import cv2
import math

def naive_image_rotate(image, degree):
    '''
    This function rotates the image around its center by amount of degrees
    provided. The size of the rotated image is same as that of original image.
    '''
    # First we will convert the degrees into radians
    rads = math.radians(degree)

    # We consider the rotated image to be of the same size as the original
    rot_img = np.uint8(np.zeros(image.shape))

    # Finding the center point of rotated (or original) image.
    height = rot_img.shape[0]
    width  = rot_img.shape[1]

    midx,midy = (width//2, height//2)

    for i in range(rot_img.shape[0]):
        for j in range(rot_img.shape[1]):
            x= (i-midx)*math.cos(rads)+(j-midy)*math.sin(rads)
            y= -(i-midx)*math.sin(rads)+(j-midy)*math.cos(rads)

            x=round(x)+midx
            y=round(y)+midy

            if (x>=0 and y>=0 and x<image.shape[0] and  y<image.shape[1]):
                rot_img[i,j,:] = image[x,y,:]

    return rot_img

def main():
    image = cv2.imread("lena.png")
    rotated_image = naive_image_rotate(image,45)
    cv2.imshow("original image", image)
    cv2.imshow("rotated image",rotated_image)
    cv2.waitKey(0)

if __name__=='__main__':
    main()
Explanation: First, we import 3 modules/libraries namely numpy, cv2 and math. The opencv-python i.e.,cv2 library is used here only for image reading and displaying purpose. While implementing the function, as a first step, we will convert the degrees into radians using math.radians() function. Then we declared the ouput image to be of the same size as original (or input) image as a numpy array with all values as 0.
Since the output and input image sizes are same, they will have same center point. In the next step, the center point of output image is calculated.
Now for correct rotation without any holes we need to fill the intensity values for output image from the new coordinates obtained using following equation:
\[\begin{bmatrix} x'\\ y' \end{bmatrix} = \begin{bmatrix} \cos(\theta) & \sin(\theta)\\ -\sin(\theta) & \cos(\theta) \end{bmatrix} \begin{bmatrix} x\\ y \end{bmatrix}\]where x' and y' are the new coordinates after rotation by angle $\theta$ in radians.
Since we want to rotate the image with respect to its center point, we subtract the center point coordinates from each coordinate location so that center point will have (0,0) value before applying the equations to calculate the new coordinate values. The new coordinates are again added with center point coordinates to get the coordinates as in the original image case. Now for each location in rotated image, we find the corresponding intensity values in original image using new coordinates.
In the last step, due to rotation, the new coordinate values may go beyond the size of the original image thus we only consider those pixels which are inside the size of the original image.
To execute the above python code type the following command at the terminal:
python3 transform1.py
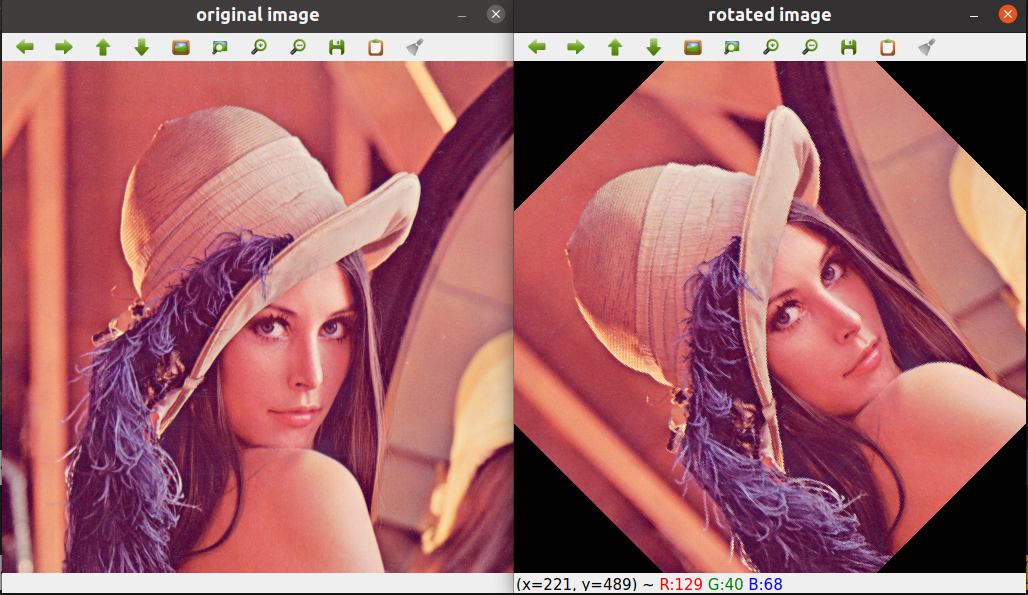
The output of the written function naive_image_rotate() for input image lena.png with $45$ degrees of rotation is as follows:
Program for image rotation with full image display
As mentioned earlier, the above code can be modified to get the rotated image showing full image as follows:
# Written by Dr. S. S. Gajbhar
# Filename: transform2.py
import numpy as np
import cv2
import math

def naive_image_rotate(image, degree):
    '''
    This function rotates the image around its center by amount of degrees
    provided. The rotated image will show the full image.
    '''
    # First we will convert the degrees into radians
    rads = math.radians(degree)
    # In this case, we consider the rotated image to be different than input
    # image size which will depend on the rotation angle.

    # Let us find the height and width of the rotated image
    height_rot_img = round(abs(image.shape[0]*math.cos(rads))) + \
                       round(abs(image.shape[1]*math.sin(rads)))
    width_rot_img = round(abs(image.shape[1]*math.cos(rads))) + \
                       round(abs(image.shape[0]*math.sin(rads)))

    rot_img = np.uint8(np.zeros((height_rot_img,width_rot_img,image.shape[2])))

    # Finding the center point of the original image
    cx, cy = (image.shape[1]//2, image.shape[0]//2)

    # Finding the center point of rotated image.
    midx,midy = (width_rot_img//2, height_rot_img//2)

    for i in range(rot_img.shape[0]):
        for j in range(rot_img.shape[1]):
            x= (i-midx)*math.cos(rads)+(j-midy)*math.sin(rads)
            y= -(i-midx)*math.sin(rads)+(j-midy)*math.cos(rads)

            x=round(x)+cy
            y=round(y)+cx

            if (x>=0 and y>=0 and x<image.shape[0] and  y<image.shape[1]):
                rot_img[i,j,:] = image[x,y,:]

    return rot_img

def main():
    image = cv2.imread("lena.png")
    rotated_image = naive_image_rotate(image,45)
    cv2.imshow("original image", image)
    cv2.imshow("rotated image",rotated_image)
    cv2.waitKey(0)
    cv2.destroyAllWindows()

if __name__=='__main__':
    main()
Explanation: In the above function, few changes are made to the function in transform1.py to get the desired output. In this case, we first find the height and width of the rotated image followed by finding the center point coordinates of both original as well as rotated image. Then we create a rotated image with appropriate height and width. Then, we find the new coordinates as in the transform1.py case except that we add center point coordinates of the original image to the new coordinates.
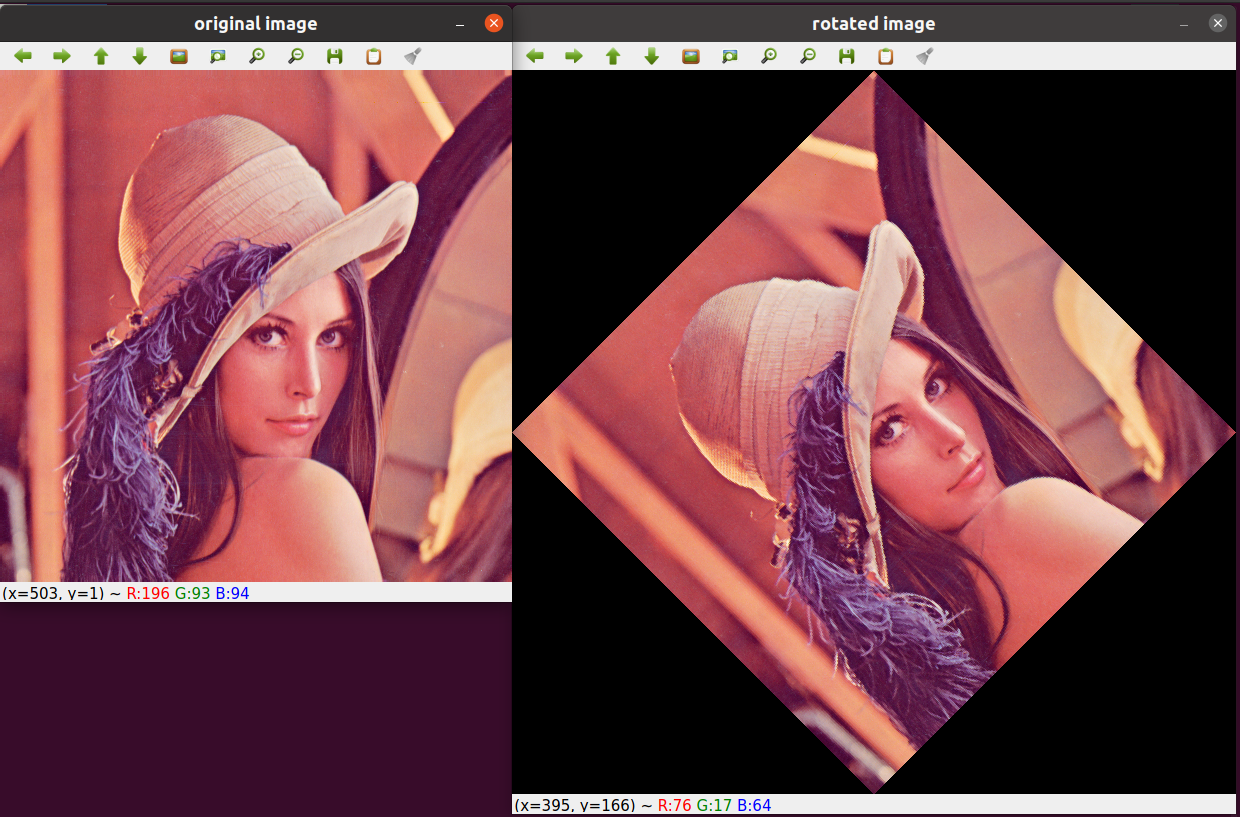
The output of the above program is as follows:
Our final naive image rotation function
The final refactored function combining the functions in transform1.py and transform2.py is given as follows:
# Written by Dr. S. S. Gajbhar
# Filename: fn_imrotate1.py
import numpy as np
import cv2
import math

def naive_image_rotate(image, degrees, option='same'):
    '''
    This function rotates the image around its center by amount of degrees
    provided. The rotated image can be of the same size as the original image
    or it can show the full image.

    inputs: image: input image (dtype: numpy-ndarray)
            degrees: amount of rotation in degrees (e.g., 45,90 etc.)
            option: string variable for type of rotation. It can take two values
            'same': the rotated image will have same size as the original image
                    It is default value for this variable.
            'full': the rotated image will show the full rotation of original
                    image thus the size may be different than original.
    '''
    # First we will convert the degrees into radians
    rads = math.radians(degrees)
    # Finding the center point of the original image
    cx, cy = (image.shape[1]//2, image.shape[0]//2)

    if(option!='same'):
        # Let us find the height and width of the rotated image
        height_rot_img = round(abs(image.shape[0]*math.sin(rads))) + \
                           round(abs(image.shape[1]*math.cos(rads)))
        width_rot_img = round(abs(image.shape[1]*math.cos(rads))) + \
                           round(abs(image.shape[0]*math.sin(rads)))
        rot_img = np.uint8(np.zeros((height_rot_img,width_rot_img,image.shape[2])))
        # Finding the center point of rotated image.
        midx,midy = (width_rot_img//2, height_rot_img//2)
    else:
        rot_img = np.uint8(np.zeros(image.shape))

    for i in range(rot_img.shape[0]):
        for j in range(rot_img.shape[1]):
            if(option!='same'):
                x= (i-midx)*math.cos(rads)+(j-midy)*math.sin(rads)
                y= -(i-midx)*math.sin(rads)+(j-midy)*math.cos(rads)
                x=round(x)+cy
                y=round(y)+cx
            else:
                x= (i-cx)*math.cos(rads)+(j-cy)*math.sin(rads)
                y= -(i-cx)*math.sin(rads)+(j-cy)*math.cos(rads)
                x=round(x)+cx
                y=round(y)+cy

            if (x>=0 and y>=0 and x<image.shape[0] and  y<image.shape[1]):
                rot_img[i,j,:] = image[x,y,:]
    return rot_img

if __name__=='__main__':
    image = cv2.imread("mountain1.jpeg")
    rotated_image = naive_image_rotate(image,45,'full')
    cv2.imshow("original image", image)
    cv2.imshow("rotated image",rotated_image)
    cv2.waitKey(0)
    cv2.destroyAllWindows()
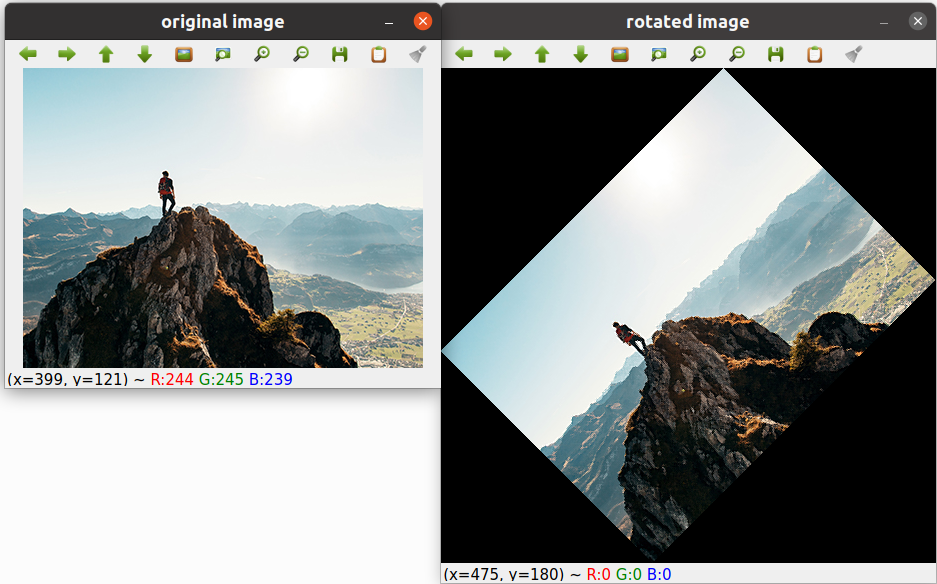
Output of the above function for image mountain1.jpeg having 300 rows and 400 columns for full image rotation
and 45 degrees of rotation angle is as follows:
The files created and used in this blogpost can be found at this repo.
References:
[1] R. Szeliski. Computer Vision: Algorithms and Applications. 2010.