[Docker] Docker for AI developers: Basics (Part-II)
In the previous blog post, we learned some basics concepts of the Docker. In this post, we will look into more details which will make us more comfortable with using the Docker.
Each time when we run a docker run command on some image, we kind of create a new computer with empty environment on which we can create/setup our application, execute it and then throw it away.
Now let’s play with some new image called as alpine to prove the above statement. Alpine is a small linux image with some pre-installed binary programs. When we run the following command at the terminal
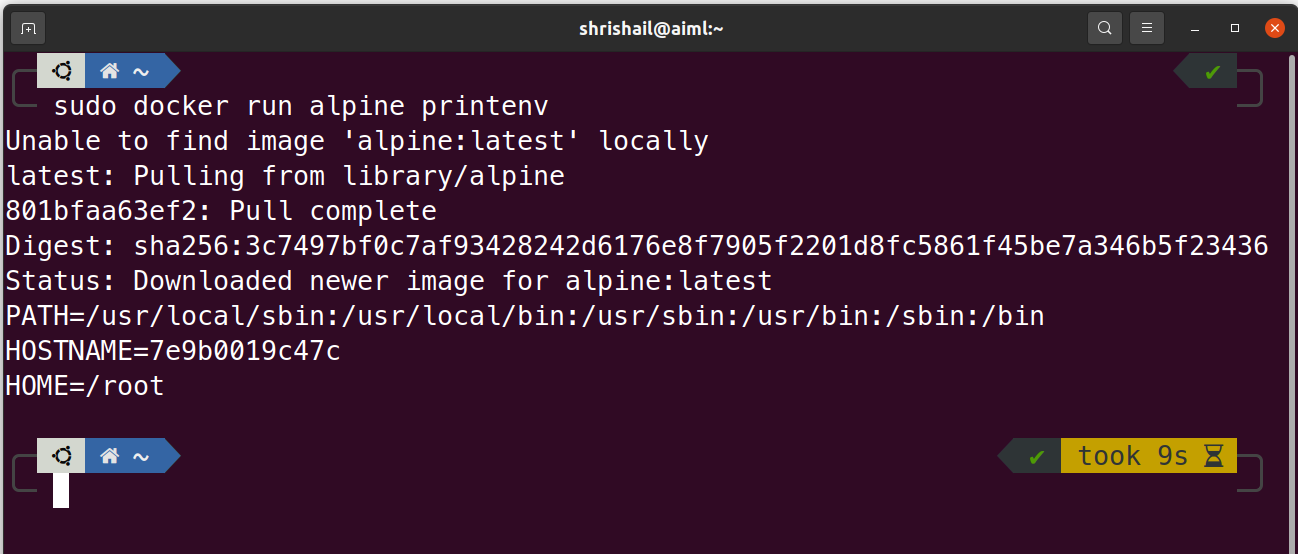
sudo docker run alpine printenv
we are instructing Docker to create and run a new container using alpine image and execute the printenv binary available in the alpine image which produces following output:
Let us run the above command twice again and see its output, we get:
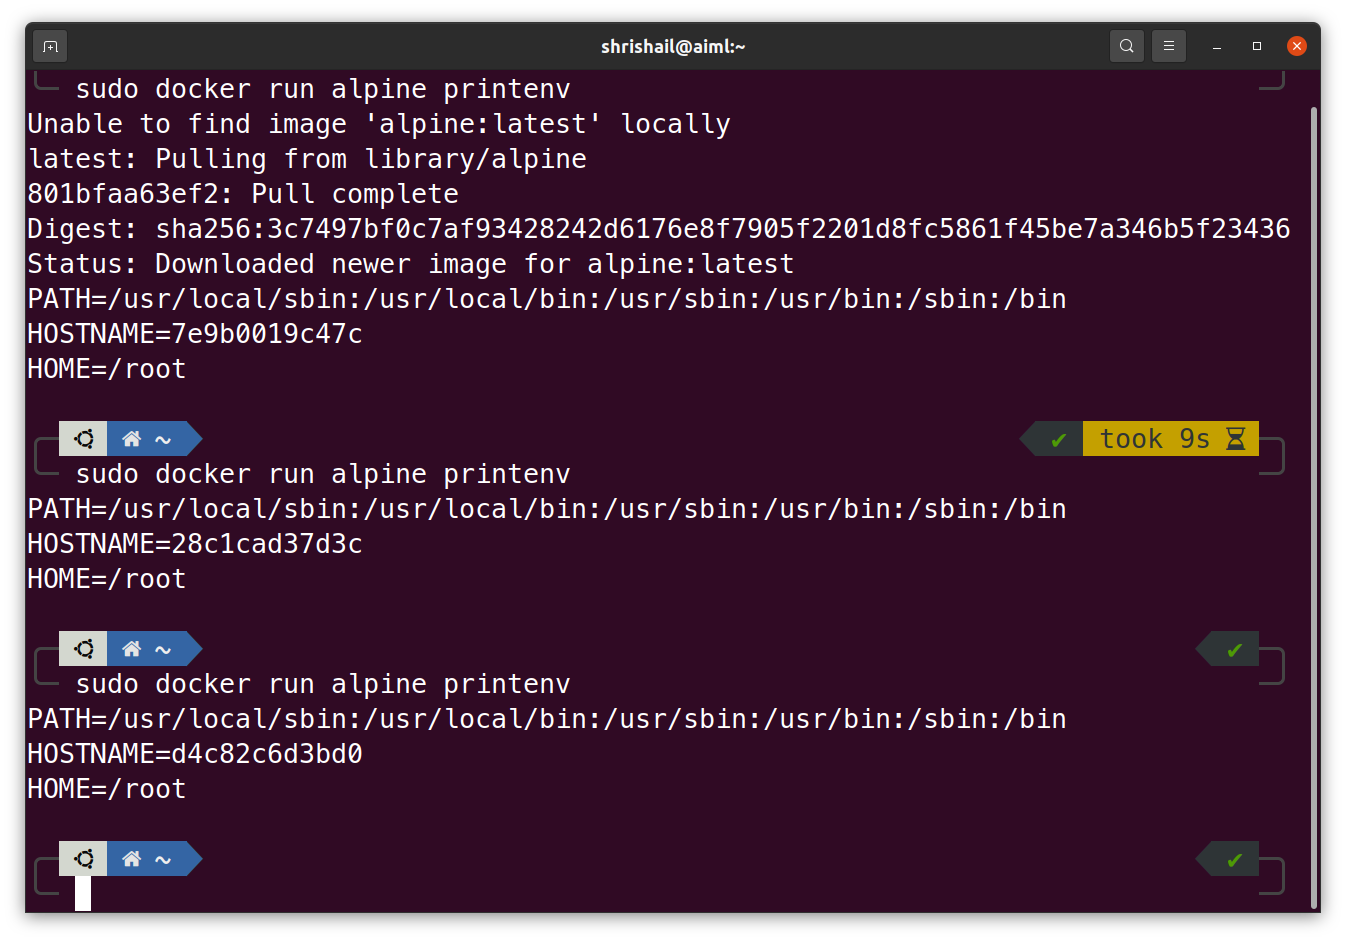
With above two commands executed twice, we are creating a new container from the same alpine image and each container is independent with unique HOSTNAME. For simplicity, this operation can be shown as:
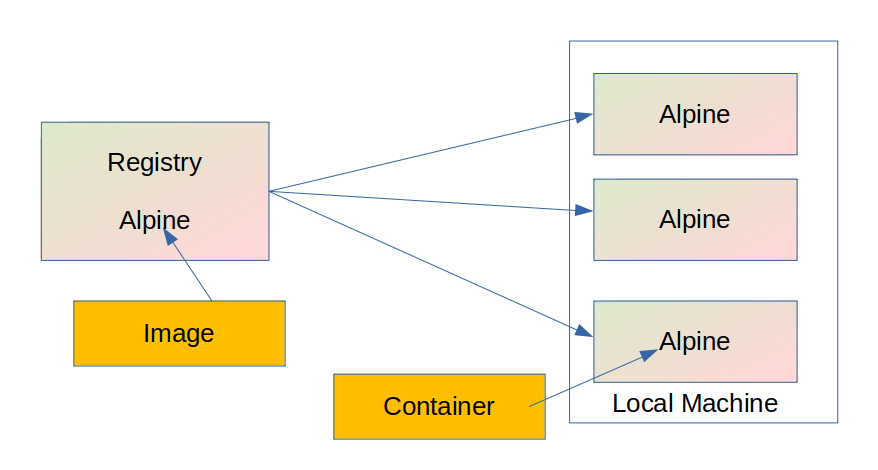
Docker is a tool that allows you to get the equivalent of a disposable, single-time use computer.[1]
Output for docker ps -a is as follows which shows three stopped containers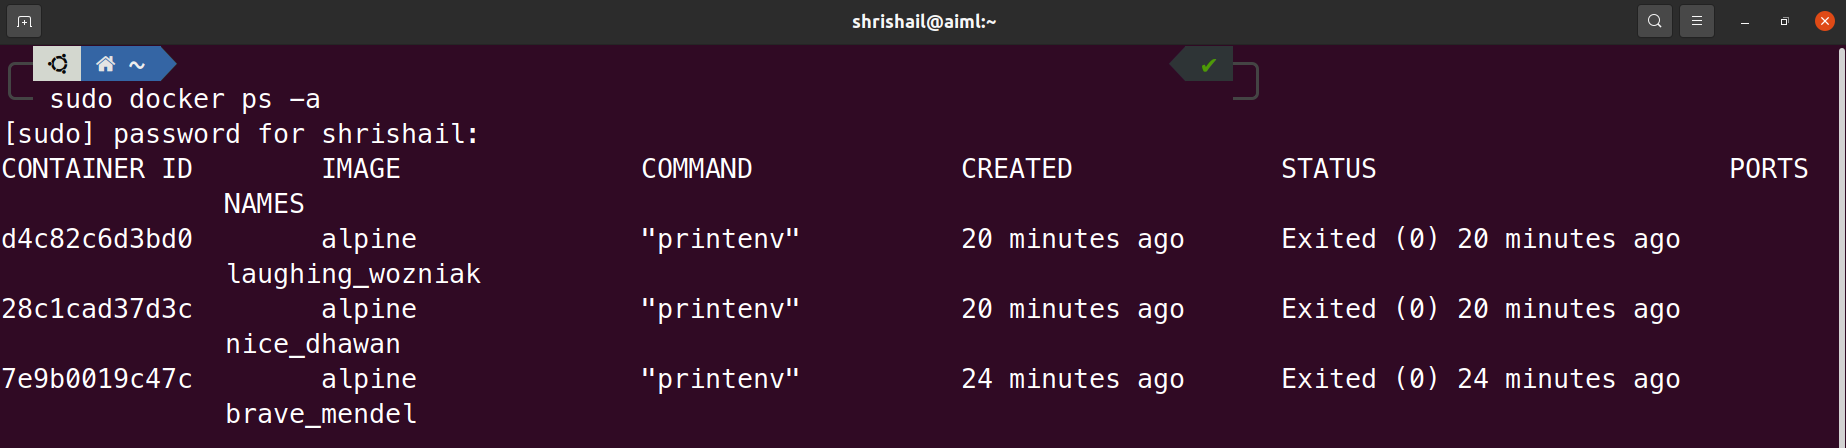
We can delete all of these containers at once using
sudo docker container prune -f
instead of deleting each container one by one using docker rm ID command. Here, the -f switch provides an implicit confirmation to proceed and delete all stopped containers, instead of asking to confirm that operation.
Useful switch to creating the long lived containers:
One can create the long lived containers and run them in the background using -d switch along with docker run command. Here, -d corresponds to detaching the container. If we don’t detach the container then it will keep running printing its output to the console window. For example, see the difference for detached and non detached containers in the following figure
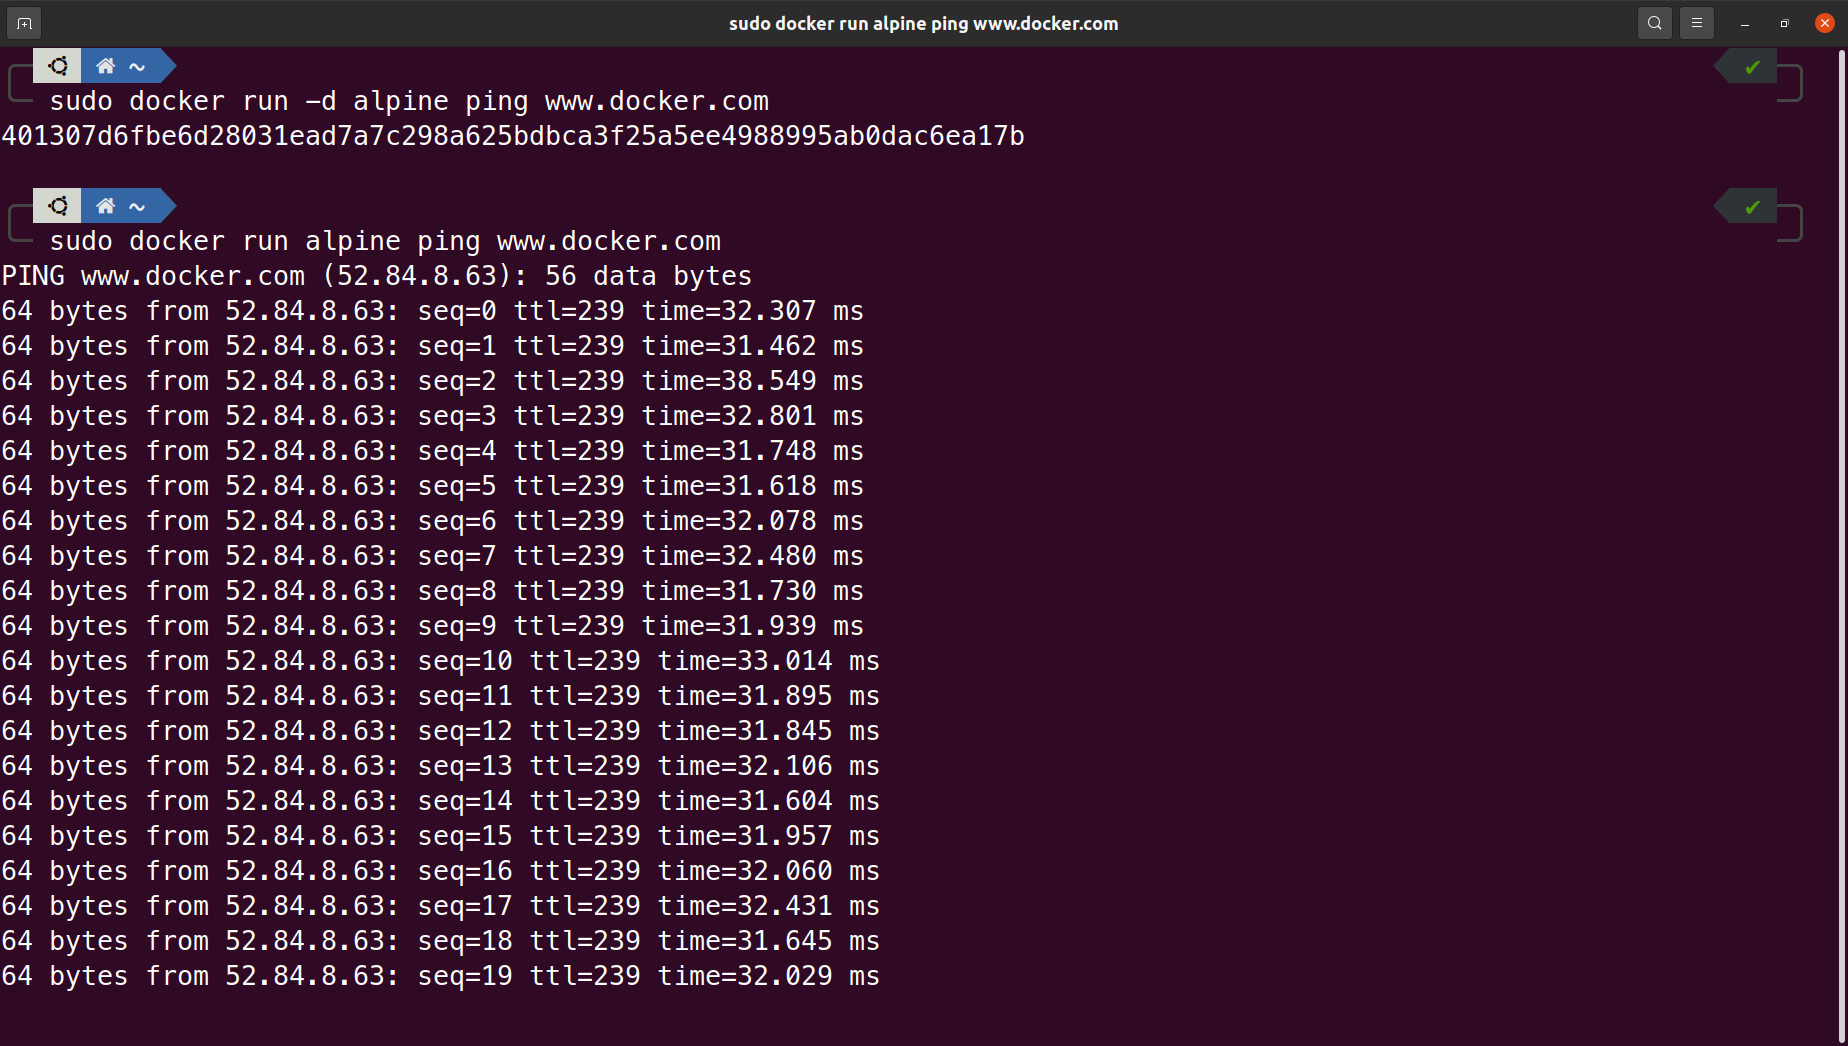
The output for docker ps -a command now is as follows:
 One can see that, the detached container is still alive where as the status for non detached container which was closed by
 Ctrl+C command is stopped.
The output for detached container can be seen anytime using docker logs ID command. This detached container can be stopped, deleted using following commands:
docker stop 401307d6fbe6
docker rm 401307d6fbe6
Listening to incoming network connections
Containers by default do not listen to the incoming connections on the local machine where they are currently running, a user has to explicitly open a port on the host machine and map it to the port on the container.
For example, the following docker run command will run a detached container created from the NGINX image which will map the input port 8085 of the host machine to the port 80 inside the containter.
docker run -d -p 8085:80 nginx
Following output will be shown:
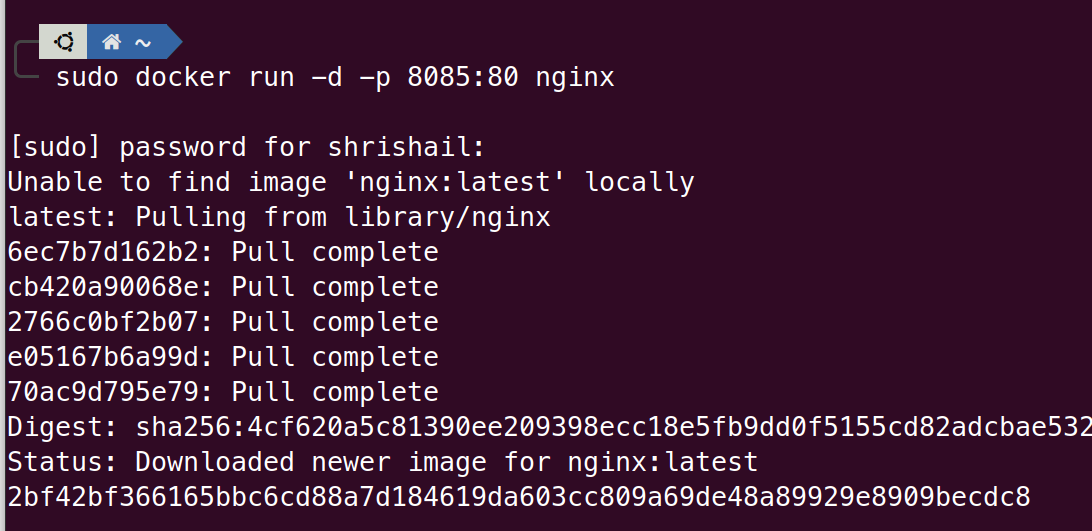
Since the nginx image was not found locally, it was downloaded from the default registry. The output won’t be displayed on the terminal since its running in the background. One can observe that we need to use the -p switch for mapping between the ports.
In short the above command can be explained as (verbatim from [1]):
We want host machine to listen for incoming connections on port 8085 and route them to port 80 inside a container that runs NGINX server
Following output will be shown for http://localhost:8085:
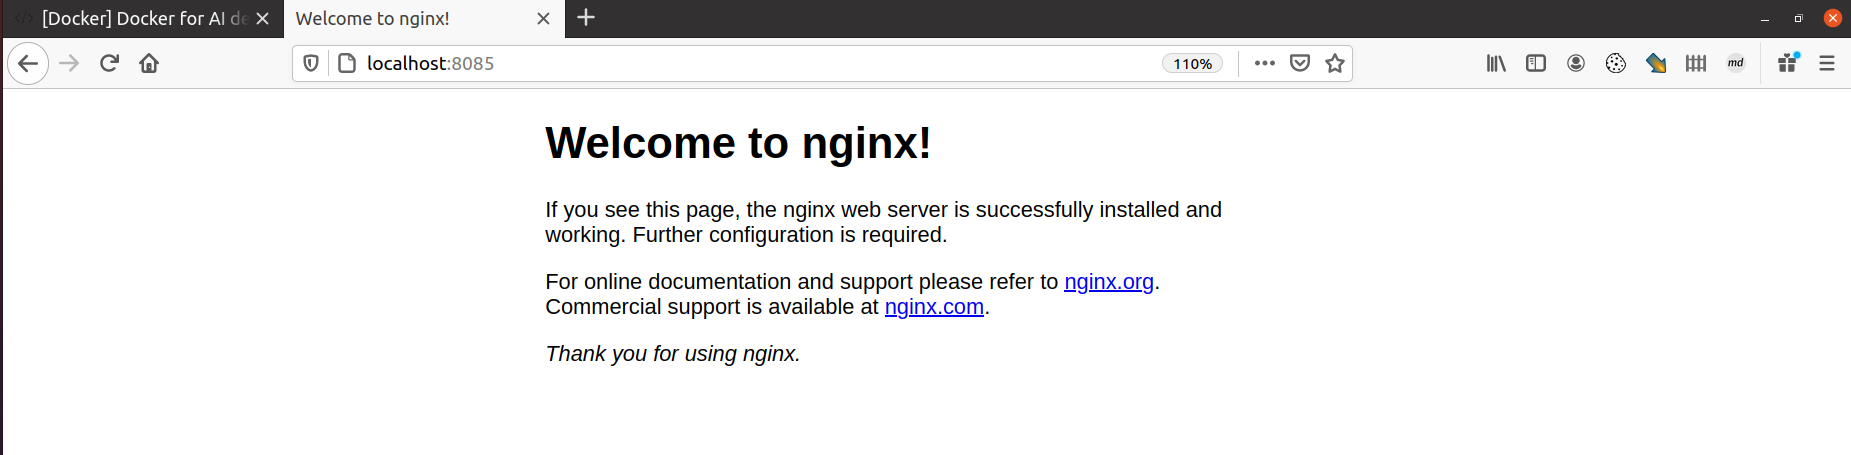
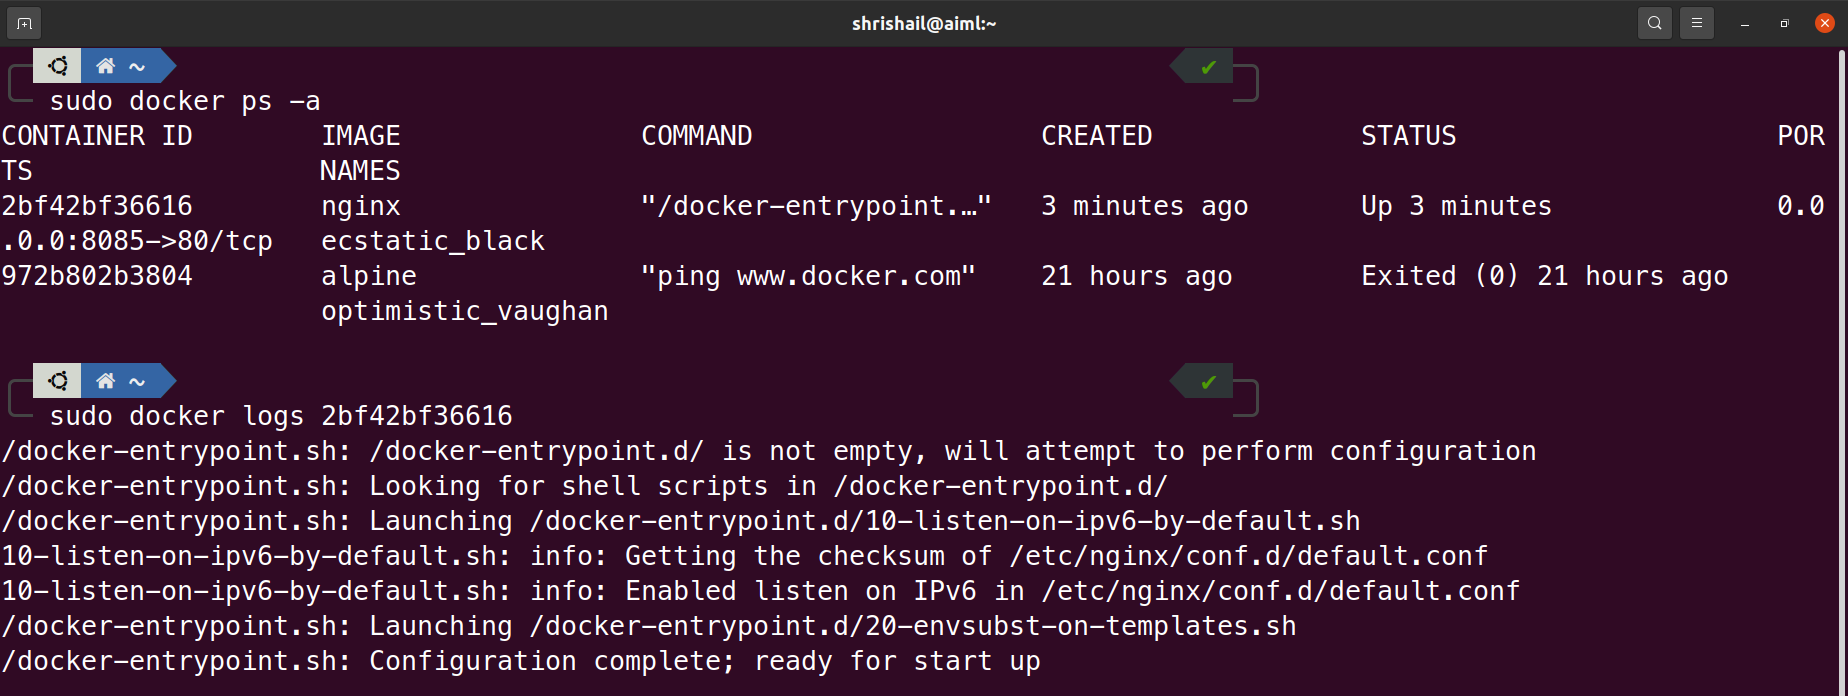
One can use the docker logs ID command to see the output at any time.
Finally we can use docker stop ID and docker rm ID commands to stop and delete the container.
So basically whenever we run the above docker run command we are kind of creating a brand new server, installing whatever we want on it and finally trashing it as per our convenience. Using Docker, one can test any software without polluting the local machine which may break some conflicting dependencies.
One can run a Jenkins server without installing Java or any other dependencies on a local machine by using:
docker run -p 8088:8080 jenkins
One can see that isolation and ease of use at a very low resource cost is an enormous advantage of using containers [1].
Using Volumes
Volumes are used in Docker to prevent the data loss or for having a persisted data storage mechanism while dealing with the containters.
Why volumes?
Whenever a container dies(stopped, failed etc.) the data inside the container is also lost as the containers are generally assumed to be stateless. To avoid data loss or having a persisted data storage one can use volumes to map a directory inside the container to a persistent storage location on the local machine. For example,
docker run -v /your/dir:/var/lib/mysql -d mysql:5.7
Here, the mapping is specified in docker run command using -v switch followed by the local directory /your/dir in this case to the directory inside the container /var/lib/myql in this case. The -d mysql:5.7 specifies to run the detached version of container created from the mysql5.7 image.
It will ensure that any data written to the /var/lib/mysql directory inside the
container is actually written to the /your/dir directory on the host system. This
ensures that the data is not lost when the container is restarted.
If we just run docker run -d mysql:5.7 then when this container is stopped or restarted or failed, the data would be lost.
Listing and deleting the available Docker Images
We can use following command to list all the available docker images
docker image ls
It produces following output:
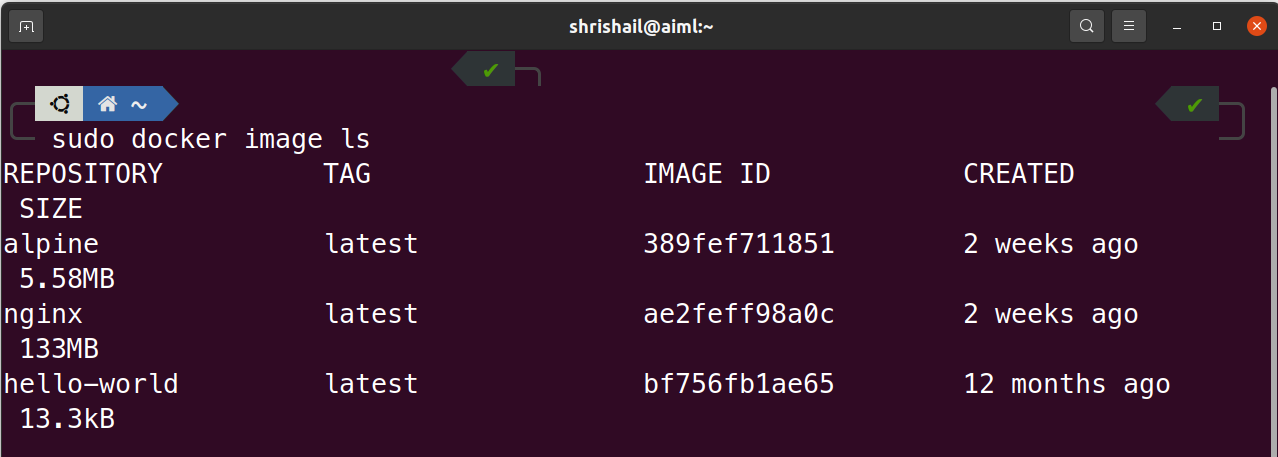
If we want to delete the hello-world image then we can delete it by using the image name or using its ID as follows:
docker rmi hello-world
or
docker rmi bf756fb1ae65
Output:
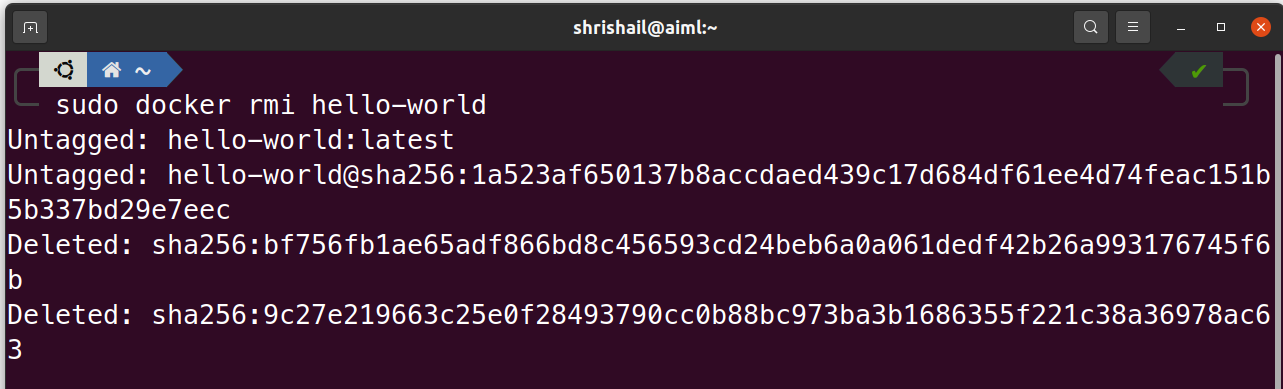 We can see that the hello-world image is deleted.
We can also delete the alpine and nginx as:
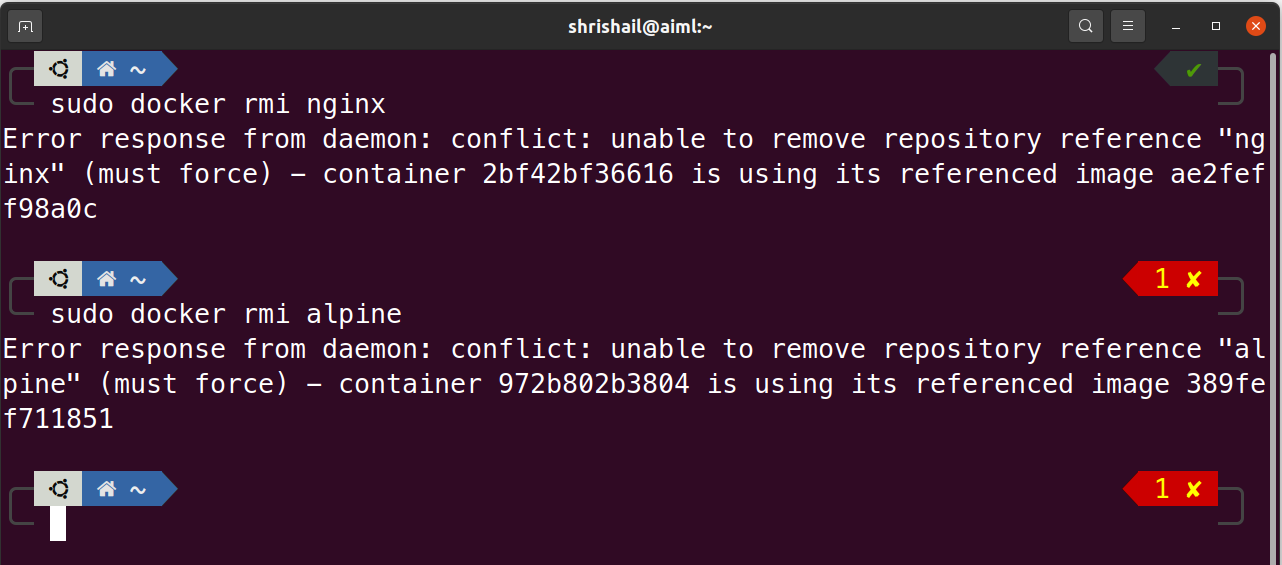 however, one can see that these images are not deleted and there is an error message showing that some containers of these images are still referenced which can be verified as
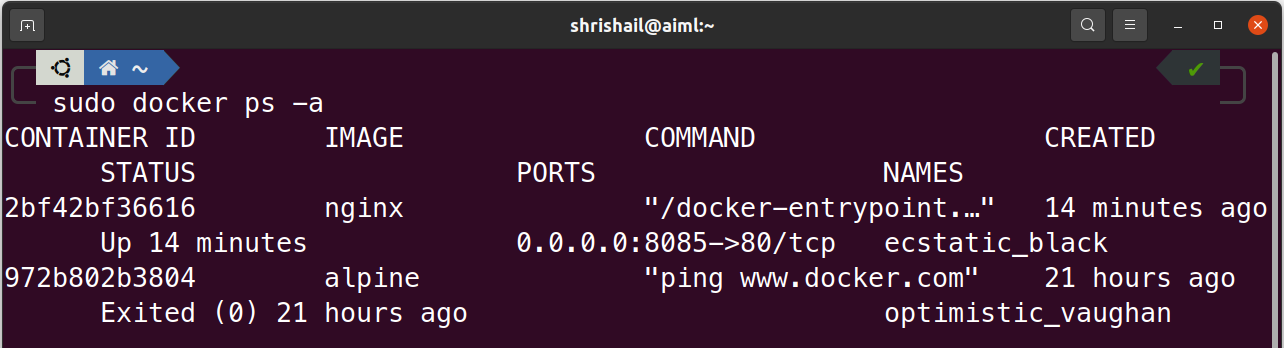 We can see that, container of alpine image is stopped however is not deleted, whereas container of nginx image is still alive.
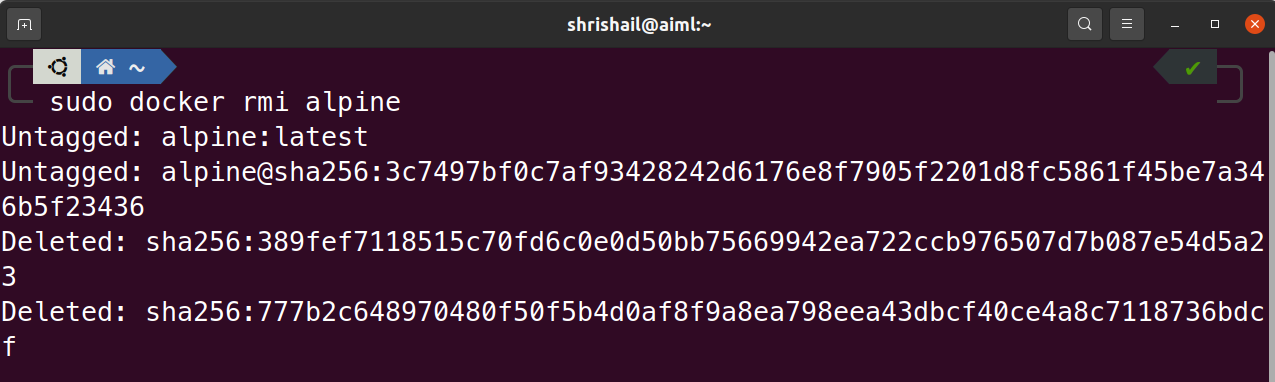
Let us delete the alpine image first by deleting its container using docker container rm 972b802b3804 and then deleting the image as
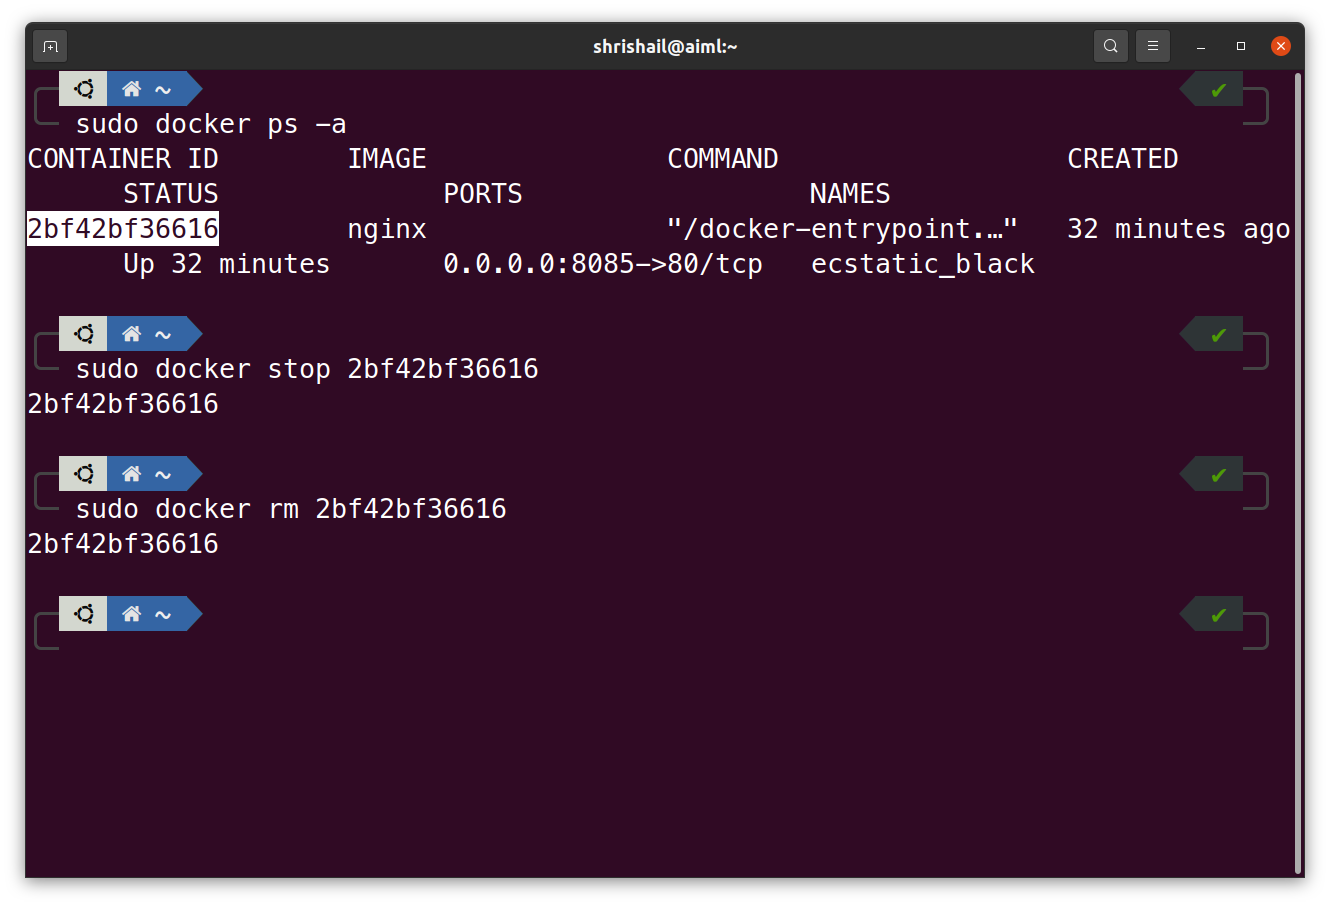
In case of nginx image we can first stop the container and then delete it as
We can delete the nginx image using
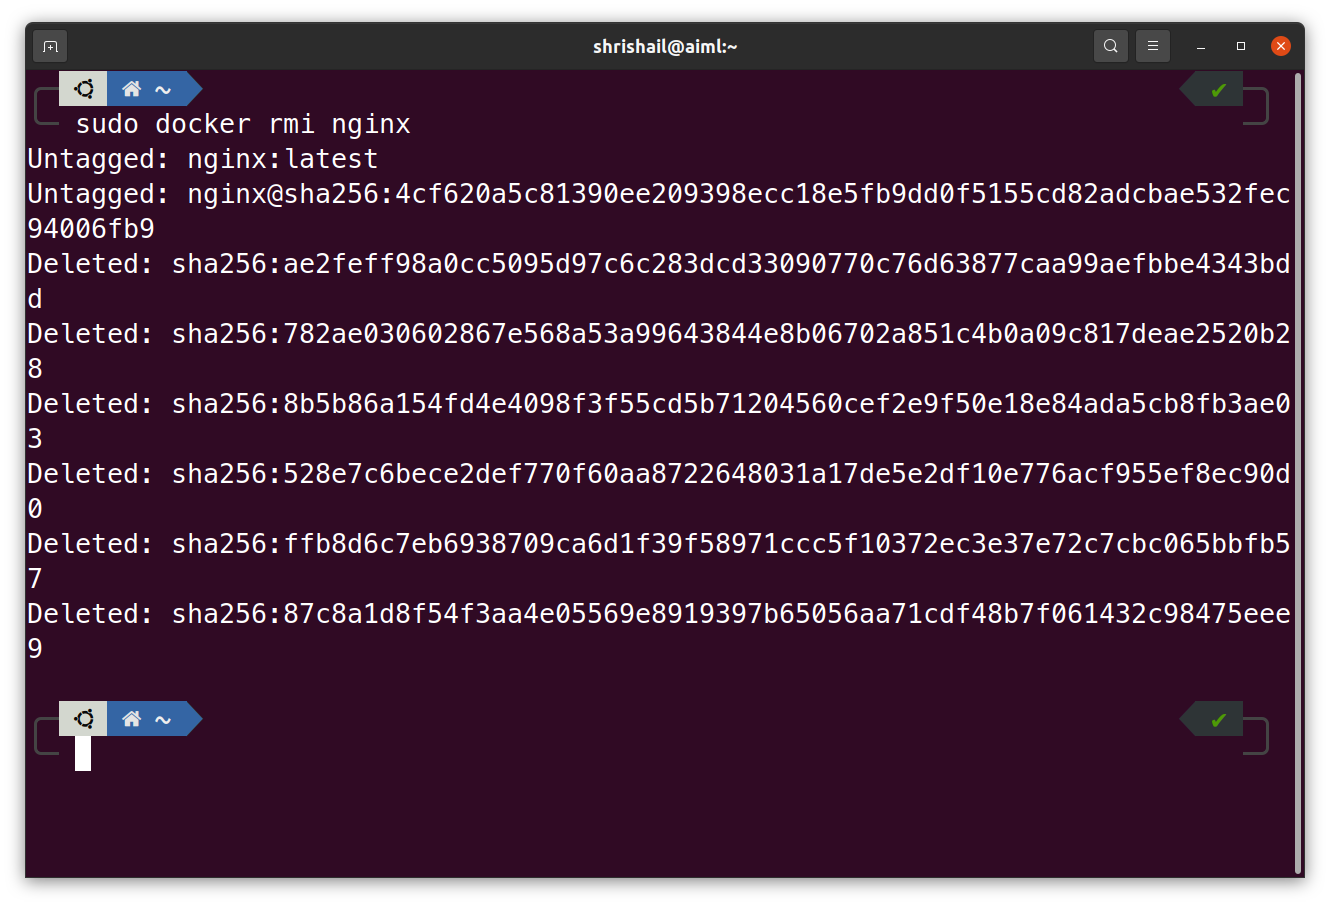
The output for command docker image ls is now:

References:
[1] Learn Docker - .NET Core, Java, Node.JS, PHP or Python by Arnaud Weil, 2018