[OpenCV] Detecting and Counting Apples in Real World Images using OpenCV and Python
In the previous blog post, we learned how to detect and count the coins in an image captured in a controlled environment. We also saw a case where the algorithm failed to detect and count the apples in a real life image mainly due to the preprocessing step of Canny edge detection.
In this post, we will consider two approaches to detect and count the apples in real world images. In the first approach, we will try to improve the coin detection algorithm of previous blog post for apple detection and counting purpose. In this approach, we will first automatize the process of Canny edge detection in which requirement to give lower and upper threshold values is eliminated. Using automatic Canny edge detection and mean shift filtering algorithm [3], we will try to get a good edge map to detect the apples. In the second approach, we will see a color image processing approach which provides us the correct results most of the time to detect and count the apples of certain color in real life images.
Improving the “coin detection” algorithm for apples detection.
The program below is an improvement of the coin detection algorithm of previous blog post for apple detection and counting purpose.
# Name: approach_1.py
# By Dr. S. S. Gajbhar
import cv2
import numpy as np
def auto_canny(image, sigma=0.33):
    '''
    This function automatically detects the edges of an input image.
    reference:https://www.pyimagesearch.com/2015/04/06/zero-parameter-automatic-canny-edge-detection-with-                  python-and-opencv/
    '''
    # compute the median of the single channel pixel intensities
    v = np.median(image)
    # apply automatic Canny edge detection using the computed median
    lower = int(max(0, (1.0 - sigma) * v))
    upper = int(min(255, (1.0 + sigma) * v))
    edged = cv2.Canny(image, lower, upper)
    # return the edged image
    return edged
image = cv2.imread('apples.jpg')
image_d = image.copy()
img_blur = cv2.GaussianBlur(image, (5,5), 0)
img_ms = cv2.pyrMeanShiftFiltering(img_blur, 10, 90)

edge = auto_canny(img_ms)
cnts,_ = cv2.findContours(edge.copy(), cv2.RETR_EXTERNAL,
        cv2.CHAIN_APPROX_SIMPLE)
c_num=0
for i,c in enumerate(cnts):
    # draw a circle enclosing the object
    ((x, y), r) = cv2.minEnclosingCircle(c)
    if r>34:
        c_num+=1
        cv2.circle(image_d, (int(x), int(y)), int(r), (0, 255, 0), 2)
        cv2.putText(image_d, "#{}".format(c_num), (int(x) - 10, int(y)),
            cv2.FONT_HERSHEY_SIMPLEX, 0.6, (255, 0, 0), 2)
    else:
        continue

cv2.imshow("Image with Apples",image)
cv2.imshow("Edge Map", edge)
cv2.imshow("Image with detected Apples",image_d)
cv2.waitKey(0)
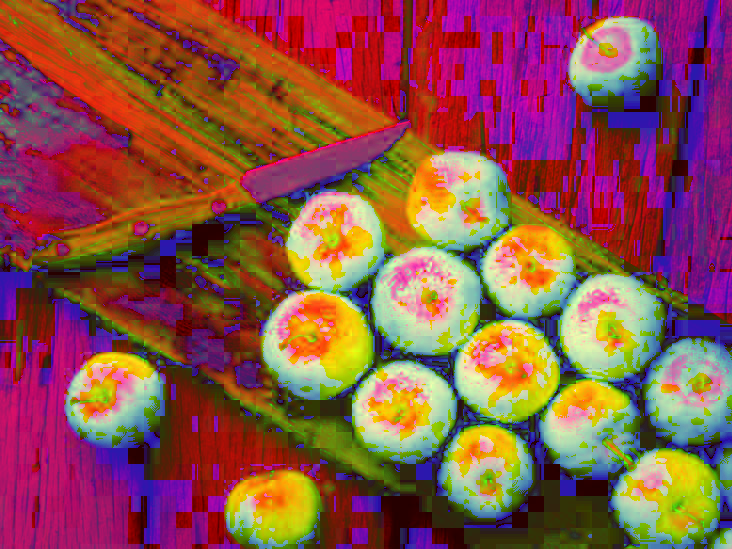
Explanation: First of all we import the necessary libraries and write a function to get the Canny edge detected output automatically. For explanation, refer the blog post of the author of the function. Then we create a copy of our original image for later use followed by Gaussian blurring operation to eliminate the noise as edge detection is sensitive to the noise. Then we apply the mean shift filtering algorithm implementation available in cv2 package which performs initial step of meanshift segmentation of an image. The output image of this function is the filtered “posterized” image with color gradients and fine-grain texture flattened. The spatial window and color window parameters are chosen heuristically. We then apply the automatic Canny edge detection algorithm to get the edge map followed by finding the contours of the edge image using cv2.findContours function. Finally for each contour we find the enclosing circle parameter and only plot the circles for which contour radius is greater than 34 (again heuristic selection which works best).
The output of the above program is as follows:
Original image:

Edge image:
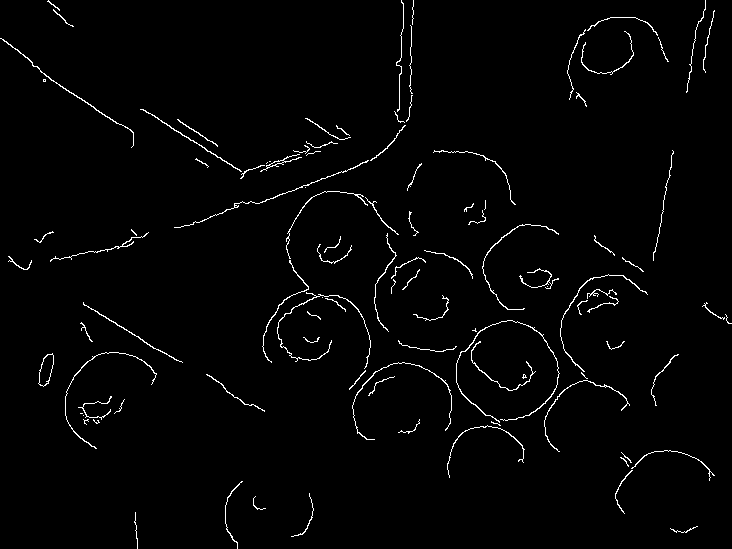
Output image:

One can see that the output image of the above program is not satisfactory in terms of apples detection and counting purpose as both the detection accuracy as well as counting accuracy is not up to the mark like humans would interpret. There are many unnecessary circles which can be removed with post processing however it would not be a good generalized algorithm as it may work for this image but not for other images.
In the next section, we will consider a color image processing based approach which gives us good results most of the time.
Best approach: using color space conversion to detect and count the apples.
In this approach, we will make use of the color space conversion to detect and count the apples with better results. One example of use of color space conversion to detect the specific type of fish is given in [1].
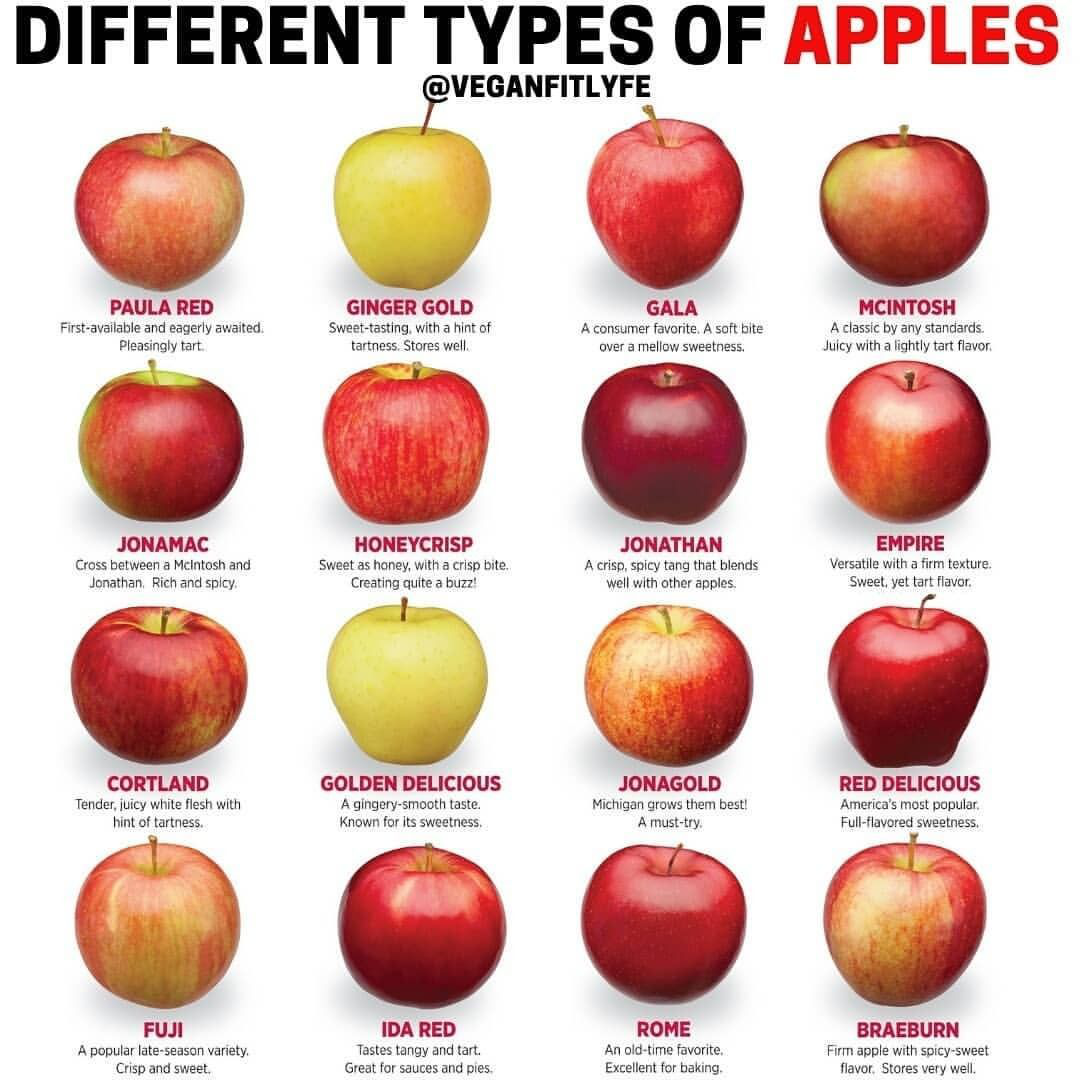
The following program provides the best results for detecting and counting the apples which are variants of red color such as:
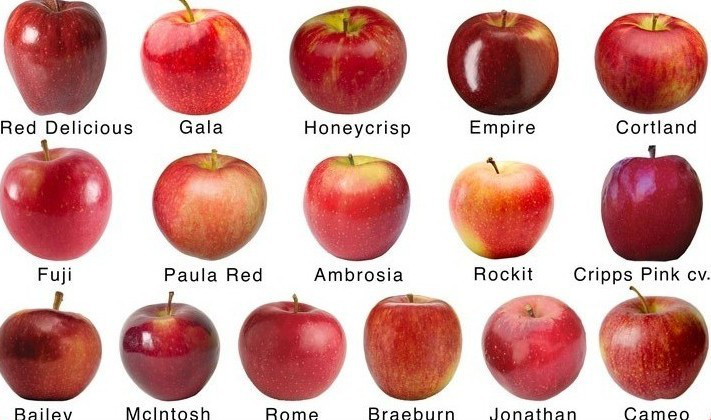
Image sources: Google images
Program:
# Name: approach_2.py
# By Dr. S. S. Gajbhar
import cv2
import numpy as np
import argparse

# Defining the color ranges to be filtered.
# The following ranges should be used on HSV domain image.
low_apple_red = (160.0, 153.0, 153.0)
high_apple_red = (180.0, 255.0, 255.0)
low_apple_raw = (0.0, 150.0, 150.0)
high_apple_raw = (15.0, 255.0, 255.0)

ap = argparse.ArgumentParser()
ap.add_argument("-i","--image", required=True, help="Path to input image")
args = vars(ap.parse_args())

image_bgr = cv2.imread(args['image'])
image = image_bgr.copy()
image_hsv = cv2.cvtColor(image_bgr, cv2.COLOR_BGR2HSV)

mask_red = cv2.inRange(image_hsv,low_apple_red, high_apple_red)
mask_raw = cv2.inRange(image_hsv,low_apple_raw, high_apple_raw)

mask = mask_red + mask_raw


cnts,_ = cv2.findContours(mask.copy(), cv2.RETR_EXTERNAL,
		cv2.CHAIN_APPROX_SIMPLE)
c_num=0
for i,c in enumerate(cnts):
    # draw a circle enclosing the object
    ((x, y), r) = cv2.minEnclosingCircle(c)
    if r>34:
        c_num+=1
        cv2.circle(image, (int(x), int(y)), int(r), (0, 255, 0), 2)
        cv2.putText(image, "#{}".format(c_num), (int(x) - 10, int(y)),
            cv2.FONT_HERSHEY_SIMPLEX, 0.6, (255, 0, 0), 2)
    else:
        continue

cv2.imshow("Original image", image_bgr)
cv2.imshow("Detected Apples", image)
#cv2.imshow("HSV Image", image_hsv)
#cv2.imshow("Mask image", mask)
cv2.waitKey(0)
Explanation: In this approach, first of all we find the range of color of the apples in the HSV space for the same image on which the first approach algorithm performed poorly.
In order to do this, we open this image in the GIMP[4] software and select the color picker tool from the toolbox as shown below and select one of the pixel of the existing apple.

Then we click on the “active forground color option” as shown below to get the appropriate HSV ranges.
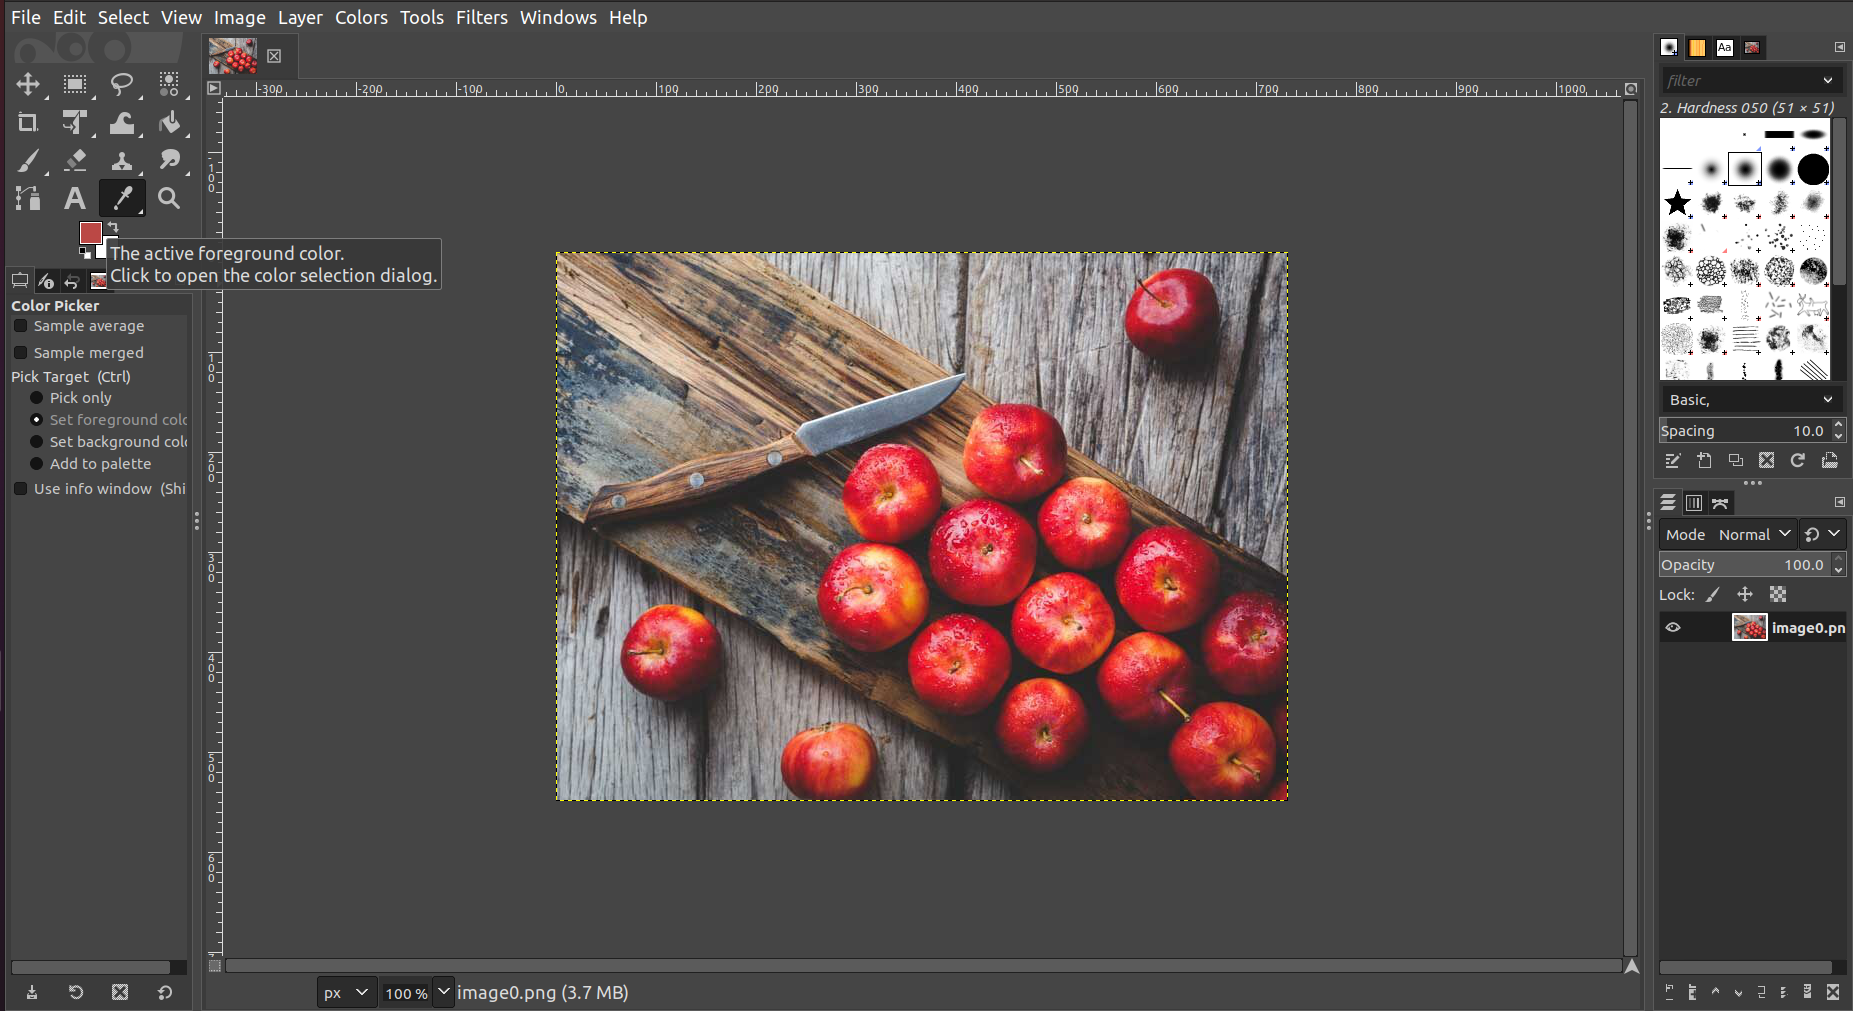
Then we can select the lower and upper ranges for the selected color by varying the H or S or V control bar using the GUI as shown below:
 However, we need to convert these HSV values obtained from GIMP software to the OpenCV HSV values for proper results. Following Python function will convert the GIMP HSV values to OpenCV HSV values.
def GIMP_HSV_To_OpenCV_HSV(gimpH, gimpS, gimpV):
    '''
    This function converts the HSV values of a color as seen in GIMP to OpenCV HSV form.
    References: https://gist.github.com/akashjobanputra/fd90aa23ca22b703bad6886f3e9a7d24
    '''
    opencvH = float(gimpH / 2)
    opencvS = float(gimpS / 100) * 255
    opencvV = float(gimpV / 100) * 255

    return (opencvH, opencvS, opencvV)
After finding the lower and upper values, we will use these ranges to create the binary mask. Now in order to have a better mask, we also consider the slight yellowish color of the apples. To create color masks we use cv2.inRange() function. Our final mask will be the addition of two masks. The ranges obtained for these colors is as follows:
- low_apple_red = (160.0, 153.0, 153.0)
- high_apple_red = (180.0, 255.0, 255.0)
- low_apple_raw = (0.0, 150.0, 150.0)
- high_apple_raw = (15.0, 255.0, 255.0)
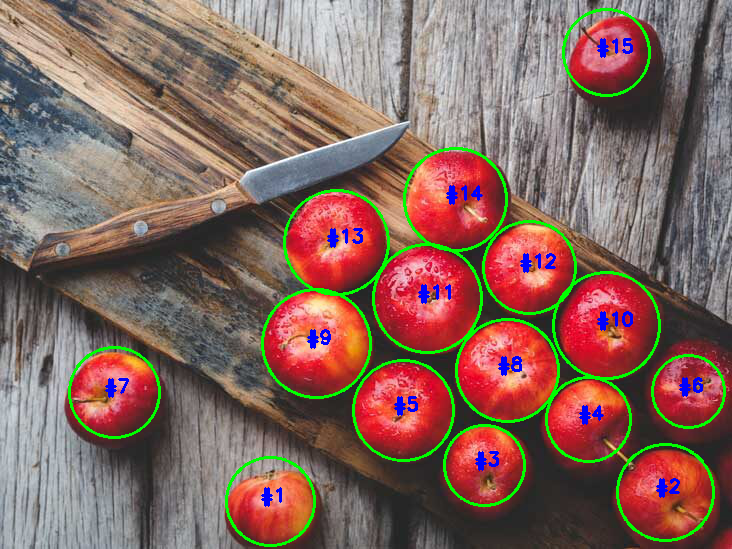
Above values are used as argument to the cv2.inRange() function with first argument as the HSV space converted image of the original color image. After getting our final mask image, we apply the cv2.findContours() function on it to get the external contours of the masks which indicate the location of the detected apples. Finally, for each contour we fit the circle and plot it on the original color image along with text showing the apple number. The output images are as follows:
Original image:

HSV image:
Mask image:

Following is the output image which accurately detects and counts the number of apples in the input image as 15!
Output of color space conversion algorithm on other real world images:
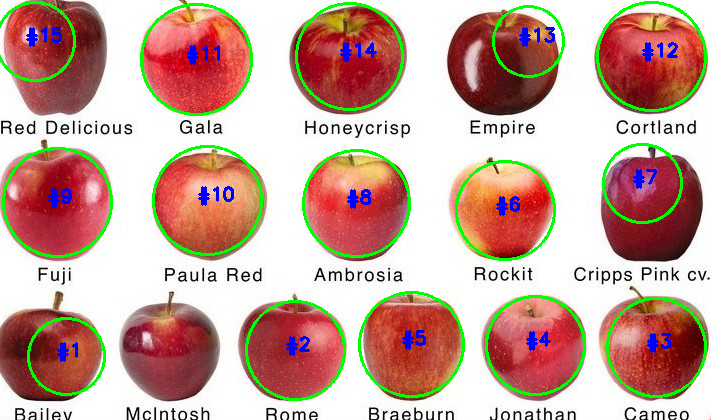
One can see that, except for one type of apple (McIntosh), above algorithm correctly detects and counts the number of apples despite different types of apples.
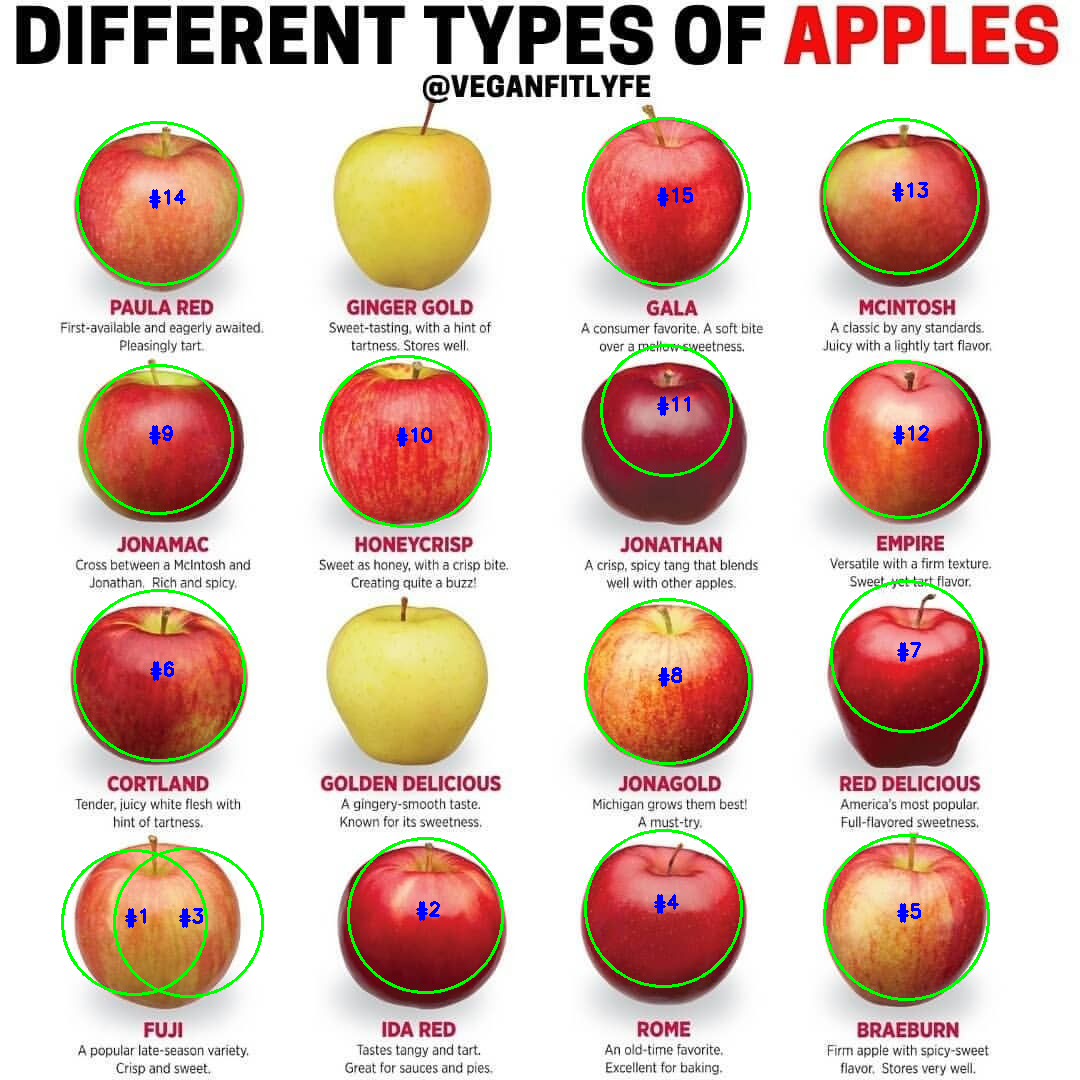
In the above image, except two yellow color apples, algorithm correctly detects presence of apples. For one apple however we can observe two detected circles which may be due to incorrect mask for that apple. One can add the range of the yellow colors of apples to have a better mask which will also detect the yellow color apples.

In the above image one can see that most of the visible apples are detected correctly using the above algorithm.
References:
- Image Segmentation Using Color Spaces in OpenCV + Python – Real Python
- Zero-parameter, automatic Canny edge detection with Python and OpenCV - PyImageSearch
- D. Comaniciu and P. Meer, “Mean shift: a robust approach toward feature space analysis,” in IEEE Transactions on Pattern Analysis and Machine Intelligence, vol. 24, no. 5, pp. 603-619, May 2002, doi: 10.1109/34.1000236.
- https://www.gimp.org/